Sunday, January 31, 2010

Importing Audio Files into Your Library


Another potential source of music for your Library is the Internet. There are millions of audio files there, and you can download these files and add them to your Library.
Or, you might have lots of MP3 files on your omputer already. You can add all these to your Tunes Library so that you can use that music rom within iTunes as well.
You can add music that is stored on your hard drive to your iTunes Library by following these steps:
  1. Locate the files you want to add to your ibrary. For example, find the MP3 files n your hard drive or go to a Web site hat has audio files, such as MP3 files, and download them to your computer.
  2. In iTunes on a Windows computer, choose File, Add File to Library to ad ndividual music files or File, Add older to Library to add a folder full of usic files. On a Mac, choose File, Add o Library. If you used the Add Folder to ibrary command, you’ll see the Browse or Folder dialog box. If you used the Add ile to Library command, you’ll see the dd to Library dialog box.
  3. Use the dialog box to move to and select he folder containing the files you want to add or to select the files you want to add to the Library.
  4. Click Open, OK or Choose (the name of the button you see depends on the command you use). The files you selected will be imported into your Library. If you selected a folder, all the songs it contains will be added to your Library. You can also add song files to your iTunes Library by dragging them from the desktop onto the Content pane. This does the same thing as using one of the Add to Library commands.

Thursday, December 31, 2009

Building Your iTunes Music Library in a Hurry

The import process moves along pretty quickly, but you can make it even faster by following these steps:
  1. Gather a pile of your CDs in a location close to your computer.
  2. Set the import preferences (encoder and quality) for the import session.
  3. Open the General pane of the iTunes Preferences dialog box.
  4. Choose Import Songs and Eject on the On CD Insert menu. This causes iTunes to immediately begin the import process when you insert a CD. When the import process is complete, the CD will be ejected automatically.
  5. Click OK to close the dialog box.
  6. Insert the first CD you want to import. iTunes will start importing it automatically.When the process is complete, the CD will be ejected automatically.
  7. Insert the next CD you want to import. Again, iTunes will import the music and eject the disc when it is done.
  8. Repeat step 7 until all the CDs have been imported. You’ll be amazed at how quickly you can build a Library, even if you have a large number of CDs. When you are done batch importing your CDs, you might want to reset the On CD insert menu to Show Songs to prevent unintentionally importing a CD.

Adding Audio CDs to Your Library


Use these steps to add a CD to your Library:
  1. Configure the encoder you want to use for the import session.
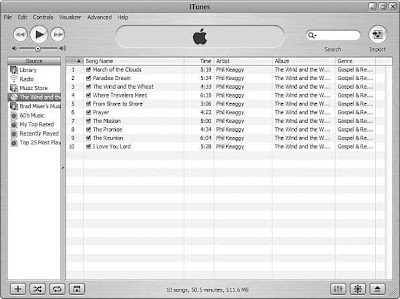
  2. Insert the CD you want to add to your Library. iTunes will attempt to identify it. When it does, the CD will appear in the Source List and will be selected. Notice that the Action button in the upper-right corner of the screen is now the Import button.
  3. If there are songs that you don’t want to add to the Library, uncheck their Selected check box. Only songs with their check boxes checked will be imported. Unless you really hate a song or disk space is at a premium for you, it is generally better to import all the songs. You can use the Selected check box in another source, such as in your Library, to cause those songs to be skipped when you play that source.
  4. Click the Import button. It will become highlighted, and the import process will start . If you left the Play songs while importing preference active, the music will begin to play as it is imported.
The Information window will show information related to the import process, such as the name of the song currently being imported and the rate at which the import process is happening. The rate of the import process depends on the hardware you are using and the import settings. In most cases, the import process will occur at a much greater rate than the playing process. For example, with moderate hardware, you can usually achieve import rates of 10, meaning 10 minutes of music will be imported in 1 minute of time. An orange circle with a “squiggly” line inside it marks the song currently being imported. When a song has been imported, it is marked with a green circle containing a check mark.
5. Eject the CD.

Configuring iTunes to Import Music

When you add music to your Library, you start by choosing the import options (mainly format and quality levels) that you want to use. Here are the steps to follow:
  1. Open the Importing pane of the iTunes Preferences dialog box
  2. Select the format in which you want to add music to your Library on the Import Using menu. For example, to use the AAC format, choose AAC Encoder. To use the MP3 format, choose MP3 Encoder. The other encoder options are WAV and AIFF. For music, you should use AAC or MP3.
  3. Choose the quality level of the encoder you want to use on the Setting menu. The options you see in this list depend on the format you selected in step 1. If you chose AAC Encoder, you have two quality options: High Quality and Custom. If you chose MP3 Encoder, you have four options: Good Quality, High Quality, Higher Quality, and Custom. The Custom option enables you to configure specific settings that the encoder will use. Because you don’t typically need to do this, we won’t explore doing so in this chapter. If you want to check it out, choose Custom on the Setting menu and explore the options you see. In the Details box, you will see a summary of the settings you have selected. For example, you will see the data rate of the encoder, such as 128Kbps, and the processor for which the encoder has been optimized. (Do you need to worry about these details? Not really.) If you use the AAC encoder, the High Quality setting will likely be all you ever need. If you use the MP3 encoder, try the High Quality setting. If music at this quality sounds good to you, try the Good Quality setting to see whether you can detect any difference. If not, use that setting. If the High Quality setting doesn’t sound good enough, increase the quality to the Higher Quality setting.
  4. If you want music you add to your Library to play while it is being added, check the Play songs while importing check box. This is a personal preference, and it doesn’t impact the encoding process significantly.
  5. If you want the files that iTunes creates when you import music to include the track number in their filenames, check the Create filenames with track number check box. Because this helps you more easily find files for specific songs, I recommend that you keep this preference active.
  6. The Use error correction when reading Audio CDs check box causes iTunes to more closely control the encoding process. You should use this option only if you notice problems with the music you add to your Library, such as cracking or popping sounds. If that happens, check this check box and try the import process again.
  7. Click OK to close the dialog box.

Saturday, October 31, 2009

Picking Song Quality Levels


After you select a format, you decide the quality with which the music will be encoded. Higher quality levels mean better-sounding music, but larger file sizes. If file size is not a problem, then choosing a higher quality setting is the way to go. If you have relatively little disk space, you might want to experiment to see which is the lowest quality setting you can choose that results in music that still sounds good to you.
Note that when it comes to music, quality is in the ear of the beholder. Also, it heavily depends on the type of music you listen to as well as how you listen to it. For example, if you listen to heavy metal rock using a low-quality pair of speakers (in other words, cheap speakers), quality will be less of an issue for you because you likely won’t hear any difference anyway. However, if you listen to classical music on high-quality speakers, the differences in quality levels will likely be more noticeable.
The trade-off for quality is always file size. The higher the quality setting you choose, the larger the resulting files will be. If you don’t have disk space limitations and have a discriminating ear, you might want to stick with the highest possible quality setting. If disk space is at a premium for you, then consider using a lower quality setting if you can’t detect the difference or if that difference doesn’t bother you.

Choosing a Format Option


Although I am sure that going into the specifications for each kind of format would make for fascinating reading, there isn’t really any need to get into that detail. Frankly, the benefit of using an application such as iTunes is that it manages all this complexity for you so that you don’t have to be concerned with it. If you are like me, you just want to work with the music, not diddle around with complicated settings.
Generally, when you add music to your Library, you should use either the AAC or MP3 format. Because the AAC format is better (with better meaning that it provides higher quality music in smaller file sizes), it is usually the best choice.

Setting Other Organization Preferences


The location of the folder in which your music will be stored is likely the most important part of the organization preferences. However, you’ll need to understand a couple more preferences.
These are also located on the Advanced pane of the iTunes Preferences dialog box:
  • Keep iTunes Music Folder Organized—This preference causes iTunes to organize your music as described earlier—that is, by artist, album, and song. Because this is a logical way to organize your music files, I recommend that you leave this option active by making sure this check box is checked.
  • Copy Files to iTunes Music Folder when Adding to Library—This preference causes iTunes to make a copy of audio files that already exist on your computer (such as MP3 files you have downloaded from the Internet), and it places those copies in your iTunes Music folder, just like files you create by importing them from a CD.
If this preference is inactive, iTunes uses a pointer to song files you are adding instead of making a copy of the files; it doesn’t actually place the files in your iTunes Music folder. I recommend that you make this preference active by checking its check box. This way, all your music files will be in the same place, no matter where they came from originally. If you don’t have iTunes make copies when you add songs to your Library and then you delete or move the song files you added, iTunes will lose track of the song and you will experience the “missing song file” problem.